Disclaimer: Before we begin, please note that we are not electricians, and any electrical work you complete yourself should always be examined by a professional before repeated use. All electrical projects are considered dangerous and should be handled and completed with care. If you are not comfortable with tackling this project yourself, an electrical contractor could easily accomplish this for you. Now that you know the risks, let’s dive in.
1. Gather your materials
This tutorial assumes that your lighting is wired for DC power, which is the case for almost all RVs. Finding DC light fixtures that look modern and cost a reasonable price tends to be difficult. For this reason, many RVers purchase and install AC light fixtures that are made for traditional homes. This requires some additional wiring but is totally doable.
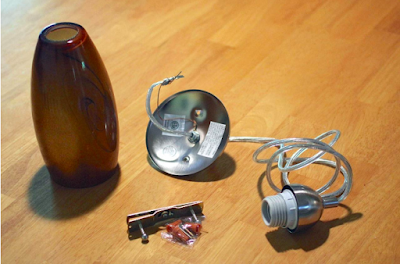
When collecting your materials, purchase your favorite AC light fixtures in whichever style you are decorating your RV. Then, purchase DC light bulbs that will fit those fixtures. These can be found in a variety of home goods stores, online RV catalogs, or even on Amazon. Once you have your materials, you are ready to begin.
2. Disconnect your house batteries and all other power sources
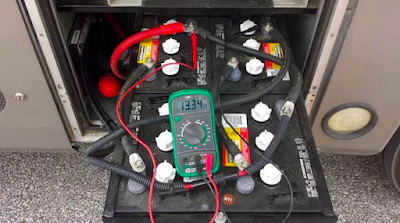
Start by disconnecting your house batteries that power your RV and anything else that connects it to power. Unplug from shore power, and double-check that nothing is switched on. This step is absolutely essential to keep you safe while you are completing this project.
3. Remove the existing DC light fixture that you will be replacing
4. Remove any fittings on the DC lines that were connected to the old fixture
5. Strip back the wire insulation
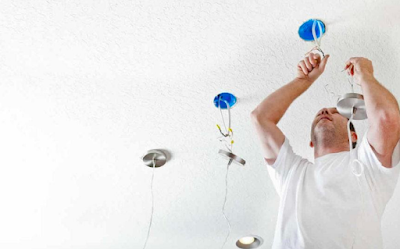
Using a sharp tool, strip back the insulation on the wiring that will connect your new light fixtures. This is necessary to connect the new fixtures to your current RV electrical system.
6. Connect the lighting
Next, you will need to connect the positive and negative DC lines to the white and black “AC” lines of the new fixture using whatever fittings you like. This is best completed using wire nuts. The DC socket light bulbs only tend to work when wired one way, contrary to simpler DC bulbs, due to their transformer. Therefore, it is a good idea to connect everything, then turn the power back on and check that the bulb is lighting before fully installing the new fixtures.
7. Add on/off switches
This is an optional step, but completing it will make your lighting situation much simpler. Many older DC light fixtures have on/off switches built into them. The new AC fixtures may not have on/off switches, so it is a good idea to retrofit switches into them. You can accomplish this by removing the switches from the old DC fixtures and installing those in the AC fixtures.
If reusing your old switches is not possible in your situation, you should be able to pick up small, simple switches at your local hardware store. These newer switches will just need to be installed inline on one side of the power feed. Typically, the negative line is used. Simply wire the negative line through the new switch, and you will have an on/off feature for your new light fixture.
8. Finish mounting the new fixture
9. Install the DC bulb and enjoy!
Once your lighting is hardwired and installed, all that’s left is to install your new DC light bulb. Make sure the new bulb is screwed in tightly, and then flip your power back on, and turn on your lights. Then, sit back and admire your hard work and your newly-modernized RV lighting.
Installing new lighting fixtures in your RV is fairly simple if you have any sort of prior electrical experience. Even without prior experience, beginners should be able to complete this project by closely following these steps. Again, do not attempt this if you are not confident in your abilities, as any electrical professional could easily complete this if you gather the correct tools tools for them. Once your new lighting is installed, you are ready to move on to the next project: making over your cab area. Stay tuned for the next update!
Have you updated your RV interior’s light fixtures? What process and methods did you use? Feel free to share in the comments below!




2 Responses
RV's are usually very dark and little light. First off, change out the bulbs with new LED Daylight or Bright light bulbs. What a difference. You can see. LED bulbs are available at any Auto Parts Store.
True, our 2013 TT had dull lights so replaced with new bright LEDs. I also added white only flexible strip LEDs around medicine chest which worked out fantastic. I could actually see to put my makeup on. Just bought a 2020 TT and the LED fixtures in the slide, kitchen, and over the bed are so bright we are replacing with residential lighting rewired for d/c. There are nice recessed lights in the ceiling, but these I’m replacing are the typical white plastic camper lights with the brightest bulbs they put in just over the recliners and head of bed. It’s like using a 100 watt bulb in a night light. Could not find what I wanted in RV lighting. Ordered 2 track lighting fixtures. This way I can use the existing hole/outlet and be able to have lights over a wider area, i.e., each recliner and each side of bed, without re-routing wiring and use a dimmer.