Traveling in an RV is a fun experience that anyone of any age or background can enjoy. There’s nothing like road tripping with a kitchen, bathroom, bedroom, and more at your constant disposal, and more people than ever are hitting the road to see just what it’s all about. But what happens when you want to buy an RV, but you don’t care for the interior style? Your best solution is to take on some renovations.
Renovating an RV interior is a challenging and time-consuming project, but it results in a finished product that you will love because you designed it yourself. Painting is typically the first project in remodeling an RV, and there are many steps to painting, as discussed in the two previous posts.
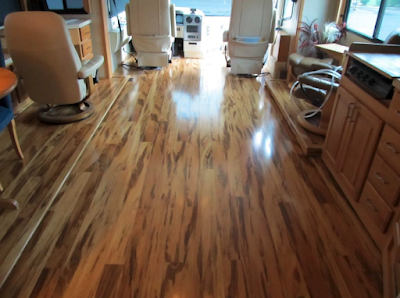
After painting, you will want to replace your RV’s flooring next. This is another tricky yet satisfying project that yields fantastic results. Follow along with these seven basic steps for a fool-proof guide to laying new floors in your RV.
1. Remove the old floor
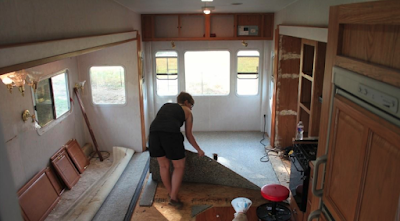
Before you can even envision the new flooring in your RV, you will need to remove the old floor. Most RVs are carpeted, and if we’re being honest, removing the carpet can be a pain. First, you will need to pull the carpet away from the walls using pliers. Once the carpet is no longer sealed around the corners and edges of the room, you can begin to pry it up. You may need to cut the carpet in parts to remove it in several pieces. Beware of the many, many staples you will find beneath the carpet, as some of these will be sharp.
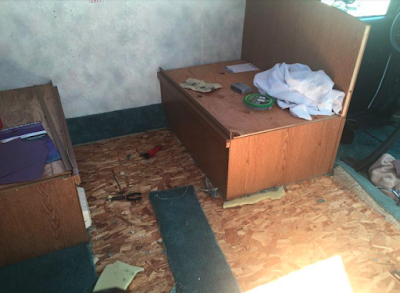
Once the carpet is removed, you will need to remove all the staples that once held it in place. This is best done using a flathead screwdriver or needle nose pliers. Double check to ensure that all staples have been removed before moving on to the next step. Once the old carpeting is completely removed, you will be left with a plywood subfloor.
2. Clean and prepare for the new flooring
Removing the carpet makes a lot of mess, and you will want to clean up well before laying a new floor. Sweep up all the carpet particles and staple pieces, and vacuum up and dust and dirt particles that may be floating around.
You will also need to move any furniture that is covering the floor, such as the couch, table dinette, and/or arm chairs. If you have a booth dinette, it is not necessary to replace the flooring under the benches. Simply move the table to another area when laying new flooring beneath it.
Finally, be sure to fill any holes or imperfections in the sub-floor to ensure that the new floor has a flat surface to rest on. Sand down any bumps or nicks, and be sure to check over the whole floor to make sure you haven’t missed anything.
2. Measure your RV’s square footage
Next you will need to measure the square footage of your RV so that you know how much flooring to buy. Your measurements do not need to be perfect, but they should be close to avoid inaccuracies. Don’t forget to measure each individual room, including the main room, bathroom, bedroom, and/or cab area (if you are in a motorhome).
3. Choose your new flooring
The biggest choice in this whole process is selecting your new flooring. Your first decision must be between wood floors and carpet. Since RVs are typically used for messy camping trips, many renovators opt for hardwood floors, since these make for less mess and easier clean-up. It is also much simpler to lay your own hardwood flooring than it is to install your own new carpeting. If you do choose to go with carpeting, you may want to hire a professional to install it for you.
Because you have to consider the overall weight of the RV, most people avoid laying real hardwood floors. However, wood-look laminate flooring is much lighter than real hardwood, and it tends to hold up very well in RVs. When choosing laminate flooring, you must then choose between peel-and-stick floors and click-and-lock floors.
Peel-and-stick flooring simply involves peeling the backing off of adhesive pieces of flooring and pressing them onto the subfloor. The process is easy, and the results are great. However, sometimes these floors can shrink over time, and they can occasionally get caught in your slideouts when they are moving in and out.
Click-and-lock flooring is a bit pricier than peel-and-stick, and the process for laying it is more involved. However, it is known for being higher quality and lasting longer. Each type of flooring has its pros and cons, so you will want to do your own research before making your final choice.
Once you have narrowed down the flooring type you want, you can head to the hardware store to look at brand, colors, and samples. Be sure to pick a color that coordinates with the paint and color scheme, and choose a high quality brand for best results. Consider buying a single piece from your favorite types of flooring and bringing it back to the RV to see how it looks in your space.
5. Plan for the slide
For many people, laying new floor in their RV’s slideouts is the most intimidating part of this whole process. However, laying floors on your slideouts is really no different than laying it anywhere else in your RV. Once there is no furniture or carpeting in the way, you will just need to ensure you have a flat surface, and that the flooring will not extend past the end caps on the slideout. Once you have planned for your slides, you are finally ready to begin.
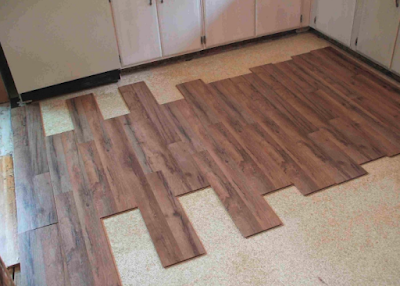
6. Lay floor
With all the preparation out of the way, you are finally ready to lay your new floors. You will want to watch plenty of Youtube videos before beginning this step so that you can see exactly how it’s done. If you are using peel-and-stick flooring, you may want to consider spraying extra adhesive onto each piece for better results.
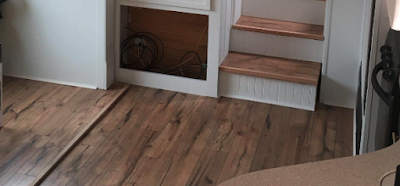
No matter which type of flooring you use, (peel-and-stick or click-and-lock), be sure to pick a corner to start in, and work your way around the room accordingly. Work in a cohesive pattern to avoid mistakes, and stagger the floors for the best overall look. When making cuts, use exact measurements and ensure the piece will stick before applying adhesive or locking it into place. Consider using transitions or thresholds between rooms for the smoothest overall look.
7. Let the floors cure
Laying new flooring is fairly simple and makes a world of difference in an RV and will increase value if you are looking to sell. Replacing the carpet is also an especially good idea in older RVs, where the same carpet has been laid for many years. Laminate flooring is great for those who travel with pets and small children and is sure to last for years of use when installed properly. With the flooring replaced, you are all set to begin the next task in your renovation project: installing new trim and moulding throughout.
Have you replaced the flooring in your RV? What steps did you follow? Feel free to drop a comment below!






9 Responses
Our floor of the slide is elevated from the main floor of the motorhome. How do you finish under that and how do you finish the edge of the slide floor?
Ours is like that also. I would like to read ideas.
We just completed a project like yours. Contact me at Chrisdparise@gmail.com if for details
We just did a project like yours. Contact me at Chrisdparise@gmail.com for the details
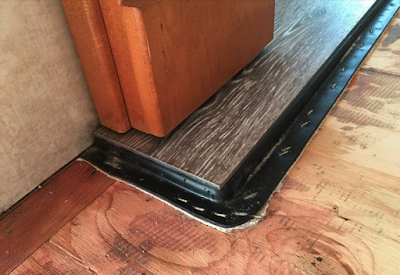
I have a class C with a slide out with the floor raised. I installed waterproof luxury vinyl planking this summer. I took as much of the carpet out as I could reach and the installed the flooring up to the edge of the carpet. You cannot tell it unless you get on your hands and knees and peer under the slide out. For the edges I went to Lowe’s (or Home Depot) and picked up some metal flooring edge seals and screwed them down.
I started under the slide and worked my way out from there. Flooring comes in several thicknesses so buy a couple pieces first to make sure they fit under your slide. Our slide drops slightly once it comes in, so we had to cut some of the wall next to our couch so it would not catch on the floor. I was unaware of that until I put the flooring down enough to put the slide all the way in.
It took about a week, part time but looks great and really had very few problems.
Does Changing to a wood floor make the space noisier, the carpet will deaden sound !
So I have to ask is this better in the long run or update with a better carpeting
Help ??
I examine your blog site presently share great information right below. Water Proof Flooring
I examine your blog site presently [url=https://www.doityourself.com/] share [/url] great information right below.
I examine your blog site presently sharegreat information right below.